Install microbetag
microbetag consists of several, independent tools,
to allow users to get an annotated co-occurrence network based on their needs.
Have a look at the Usage modes section regarding the different modules supported.
Here we provide instructions for installing the required components for each module across various computing environments.
Where to get what
MGGapp:The app on your Cytoscape
Source code for the app
microbetag_preptool:The tool on DockerHub
microbetagstand alone:The tool on DockerHub
microbetagDB:Key data products on Zenodo
Install MGG Cytoscape
To start using microbetag and/or to visualize microbetag-annotated networks, you need first, to make sure you have Cytoscape on your system; if not, go ahead and download Cytoscape.
Then, you need to install the microbetag app (MGG) from Cytoscape App store.
Make sure you first launch Cytoscape and then visit Cytoscape Appstore.
If you have already visited the MGG page on Cytoscape Appstore, launch Cytoscape and refresh the Cytoscape Appstore page.
You should now see the Install button.
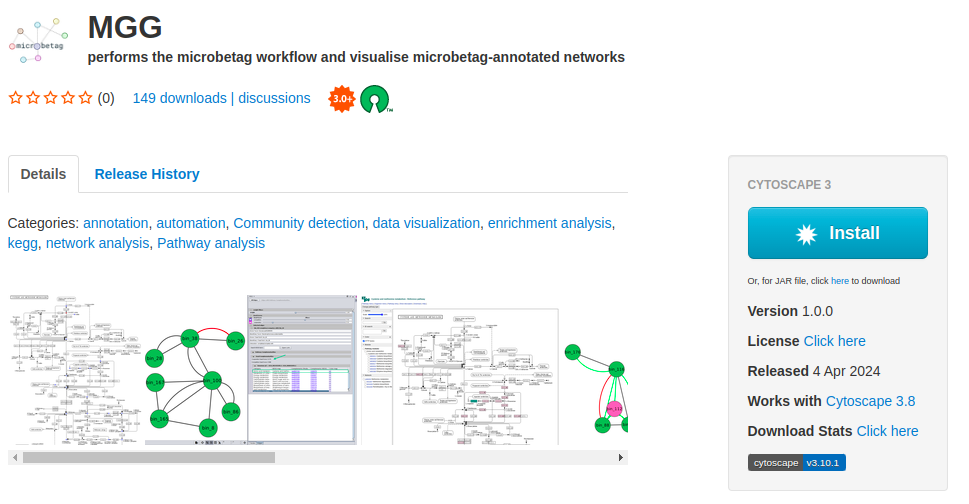
By clicking it, it will be automatically integrated on your Cytoscape.
If you visit Cytoscape Appstore and you have not lunched Cytoscape, you will see a Download button instead of the Install.
As already mentioned, we suggest you lunch Cytoscape and refresh the page.
Otherwise, you can click the Download button and move manually the .jar file to the apps folder of your Cytoscape.
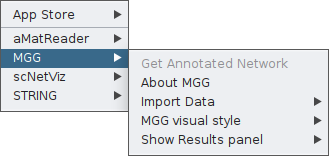
You can also get MGG from within Cytoscape by clicking on the Apps tab of the main bar and then App Store > Show App Store and typing microbetag on the box that pops up.
Once the app is installed, you may click on the Apps tab, and you will find MGG there.
Install stand-alone microbetag
If you are interested in running microbetag with your own genomes, or if you would like to go for any
of its features independently, you need to install the actual microbetag pipeline, and its several dependencies.
To this end, you may use its source code or its containerized versions.
.. locally
To install the microbetag stand-alone tool locally, you need first to make sure you have conda or miniconda.
If not already available, you may follow instructions
here.
Then, you need to clone or download microbetag’s source code locally and fire a bash script that will build the required environments for the different microbetag modules:
    git clone https://github.com/hariszaf/microbetag.git

    cd microbetag

    bash setup_environment.sh
microbetag depends on several software packages that often have co-exclusive depdencies.
To address this challenge, microbetag makes use of different conda environmets for each of these packages.
Therefore, once the setup_environment.sh script is complete, you should have the folllowing list of conda envs:
microbetag: a Python 3.10 based environment; the basic environment for the microbetag pipelinemtg-phenotrex: for predicting genome-based phenotypic traits withphenotrexmtg-modelseedpy: for genome-scale metabolic network reconstruction with [ModelSEEDpy] (https://modelseedpy.readthedocs.io/en/latest/){target=”_blank”}mtg-dnngior: for gap-filling draft reconstructions with DNNGIOR
Even most of the dependencies can be installed at the user level,
to enable the
RASTtk,
there are some Perl requirements that if not already available, they do require to be installed by your admin,
i.e. requiring sudo rights.
Also, gdebi
is required for installing RASTtk.
Note
The setup_environment.sh script will build two conda environments:
one for running the phenotrex tool alone, called
phendba second for all the rest requirements and the main
microbetagfeatures, calledmicrobetag
The software installed, e.g. Prodigal, HMMER etc, will be installed under your $HOME:
cd
ls .microbetag
/home/my_user/.microbetag
Danger
We have noticed a weird behavior on MacOS when installing phenotrex locally.
In case the setup_environment.sh script fails, you may try to install dependecies required
on MacOS for phenotrex based on the error message you get,
and then try to continue the microbetag installation.
Remember to install phenotrex in the phendb conda environment.
.. as a container
A Docker image for microbetag is available, and we have successfully tested it using Singularity as well.
For installing either of those, check the below for more.
Assuming Docker is available, you may get microbetag simply by running:
docker pull hariszaf/microbetag:<version>
In case <version> is blank, Docker will pull the latest version of microbetag.
Note
As discussed in the tutorial for running microbetag locally, a configuration
YAML file is required.
Make sure to obtain this from the
microbetag GitHub repository
and ensure it matches the version of microbetag you are using.
Install microbetag_prep tool
In case of amplicon datasets that cannot be analyzed directly on-the-fly, you can perform the computationally heavy task of:
the network inference through FlashWeave as well as
the taxonomy annotation against a GTDB-specific (v.207) 16S rRNA database
locally, using the microbetag_prep tool.
The latter, makes optimizes the matching of a taxonomy to a genome on microbetag.
Then, download the microbetag_prep image either by running:
docker pull hariszaf/microbetag_prep:<version>
or
singularity pull docker://hariszaf/microbetag_prep:<version>
Further dependencies
Containerization technologies: Docker and Singularity/Apptainer
Most of microbetag’s modules are available as containers too.
So far, we have tested them using:
🐳 Docker
⚡Singularity: specified for HPC systems
Install gurobi license
If you are about to run microbetag locally and reconstruct Genome Scale Reconstructions (GENREs)
based on your own genomes/bins/MAGs, microbetag wraps two widely used approaches:
using
modelseedpy:this approach requires a RAST annotation of your bins which depends on a successful connection to the RAST server. It makes use of the ModelSEED resource and its identifiers, but so-far it can be a rather time-consuming step and quite often unsuccessful, due to RAST-related issues.
Note
moodelseedpyis currently under active development, and we anticipate that this approach will become more robust in the near future.using
carveme:that can be performed in both DNA and protein sequences, make use of the BiGG identifiers and required a Gurobi license (see section GEM reconstruction step)
Both approaches benefit a lot from solvers, such as gurobi; carve actually requires one to run
(either Gurobi or CPLEX).
In the following sections we provide some links on how to get a Gurobi license (for academics):
- locally

- for using it on a container
.. on a local system
We found this video (released on 2022) quite helpful on how to get a Gurobi license.
Your license is a gurobi.lic file. To check that your Python can actually use the license, you may run:
    conda activate microbetag
    python
and then
    >>> import gurobipy as gbp
    >>> m = gurobipy.Model()
    Set parameter Username
    Academic license - for non-commercial use only - expires 2025-04-15
.. on a container
When you are using microbetag stand-alone tool as a container,
you will need a different kind of Gurobi license,
one called
Web License Service (WLS)
Gurobi license.
You may find the following link useful on how to do that.
After you get your WLS, it will be again be a gurobi.lic file, you need to mount it on the microbetag container.
For example, assuming you have the gurobi.lic file in the folder you are running the following docker command from:
    docker run --rm -it  \
        --volume=./tests/dev_io_microbetag/:/data \
        --volume=./microbetagDB/ref-dbs/kofam_database/:/microbetag/microbetagDB/ref-dbs/kofam_database/ \
        --volume=gurobi.lic:/opt/gurobi/gurobi.lic:ro \
        --entrypoint /bin/bash  \
        hariszaf/microbetag:v1.0.2
Note that microbetag is looking for the license under /opt/gurobi/.