.. using a co-occurrence network
In case you already have a co-occurrence network based on your data, you can ask microbetag to directly annotate it.
In this tutorial, we show how to run microbetag using a network of your own.
Note
INPUT FILES USED IN THIS TUTORIAL
The network we will use (edgelist.tsv) comes from the study of
Hessler et al. (2023) [7].
We would like to thank the authors for sharing their data.
The abundance table (vitAbund.tsv) however does not represent the one of the actual study.
It is a pseudo abundance table that only includes the bin names, exactly as they are called in the network file, to highlight that it is not the abundance data that are of interest now.
Hessler et al. investigated factors that control community organization in mine tailings-derived laboratory microbial consortia and were able to link a Variovorax species as an important source of thiamine.
If you already have a network, then you need to provide both the network and the abundance table and make sure that the sequence identifiers in those two files are the same; meaning that the node ids of the network are present in the abundance table in the column representing the sequence identifier.
For example, a toy model of a network file would be:
node_A |
node_B |
weight |
|---|---|---|
bin_1 |
bin_2 |
0.84 |
then, the corresponding abundance table would have, among other records, to have the following two lines:
sequenceIdentifier |
sample_1 |
sample_2 |
sample_3 |
taxonomy |
|---|---|---|---|---|
bin_1 |
234 |
42 |
43 |
g__Devosia;s__Devosia sp001899045 |
bin_2 |
324 |
54 |
43 |
g__Pseudonocardia;s__Pseudonocardia sp001899645 |
Note
Taxonomy here is only partial.
Make sure you always have a 7-level taxonomy, e.g.
d__Bacteria;p__Proteobacteria;c__Alphaproteobacteria;o__Rhizobiales;f__Devosiaceae;g__Devosia_A;s__Devosia_A sp001899075
So, this time we will load the vitAbund.tsv file.
Here how this looks like:

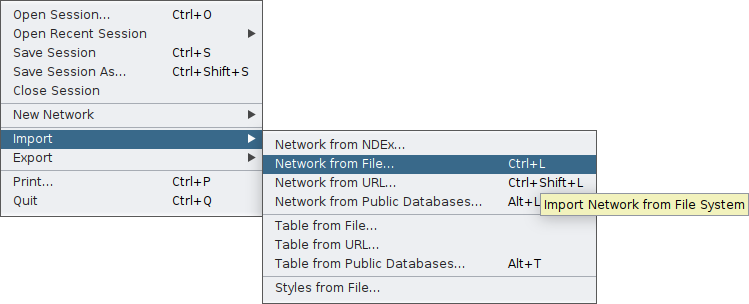
Then, you need to import your network first on Cytoscape through the main File tab:
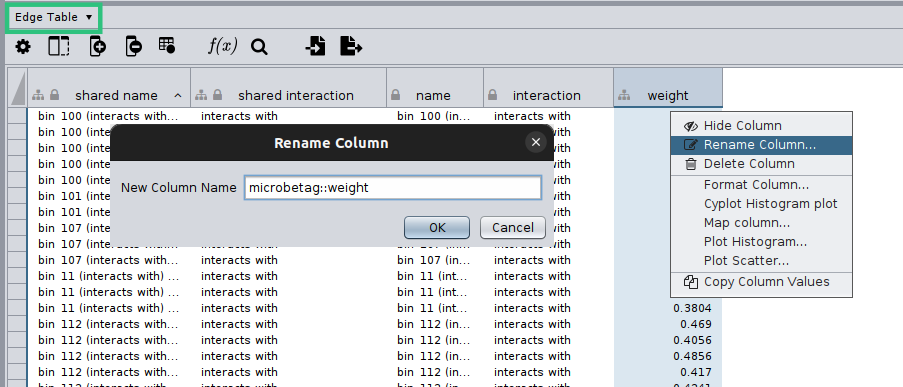
Cytoscape will display your network and on the bottom of your screen you will have the core tables of a Cytoscape network.
As your network may have several edges, you need to make clear which edge attribute you would like microbetag to use; this is essential in cases network clustering will be performed.
To do so, you need to move on the Edge table by clicking on the arrow next to the Node table that is displayed by default, and then rename the column of your choice to microbetag::weight.
Now you are ready to import your network to MGG though its main menu on the Apps tab:

Finally, you can again check your network as loaded on MGG through the Check Data Files tab:
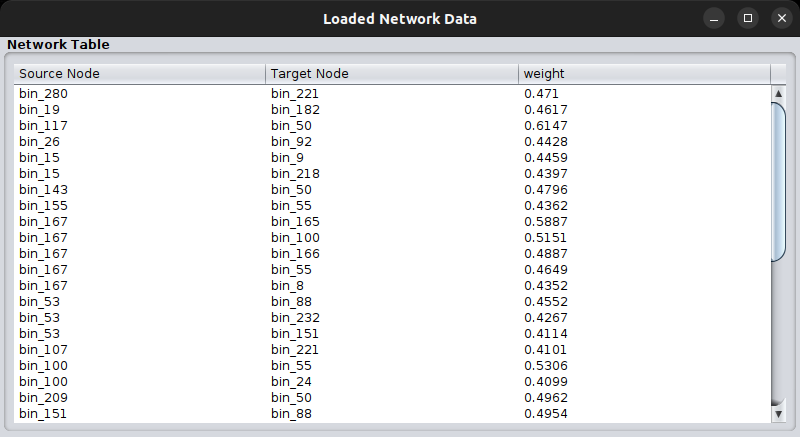
Important
If the node names of the network are not included in the sequence identifiers of the abundance table, you will not be able to import your network to MGG.
Once both your abundance file and your network are imported, you can proceed as in the
Starting from an abundance table case,
by clicking on Get Annotated Network on the main menu of the MGG app on the Apps tab and setting the parameters required.
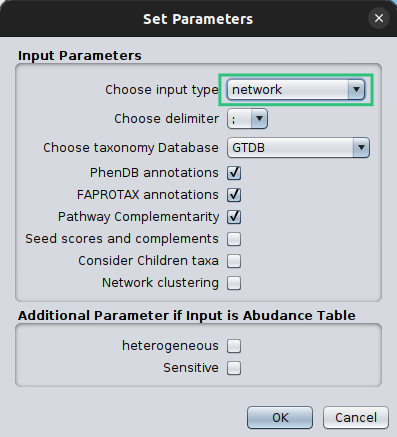
Make sure that you set the Choose Input Type as network this time, otherwise microbetag will ignore your network and try to build on of their own.
This will take significantly less time and here is the returned network:

Now, you can go through the Investigating the annotations tutorial to check how good microbetag did with Variovorax-related annotations.